What a week! As everything prepares to begin to opening in wake of the Coronavirus here in the United States I’ve been trying to plant roots and seeds of my favorite fruits and vegetables to see if they grow.
Now two weeks ago I had promised that I would update you on my attempt to grow a pineapple plant. So far I have zero germination on the seeds in the jar, however, I did learn that they can take up to three months to actually grow and germinate. 
If I learned one thing from this whole experience so far it’s that patience really is a virtue. They really are the sloths of the plant world in terms of growing and fruiting. Before we dive right in though, here’s what you’ll need:
A Pineapple
A knife for cutting up the pineapple
Paper towel to allow your root to dry out on
A pair of scissors for trimming the leaves.
A standard pot-for planting!
Soil-experts recommend perlite and sand-I used ordinary soil.
A semi shaded room and space for the plant to receive adequate indirect sunlight.
Before we make it to step 7 we’re going to need to accomplish step 1 and that’s picking a pineapple! Any old pineapple from the grocery store will do just make sure it looks healthy and hardy. You want it to be just right by that I mean not too soft or soggy and not too firm and unripened.
When looking for a PERFECT Pineapple:
•Stay away from any pineapples with soft spots or bruises (these are signs of damaged fruit).
•Avoid pineapples with no darkened “eyes” (this means it’s “old” and has soggy flesh.
•Avoid choosing over-ripened fruit (this means if you can easily pull off the leaves).
•Pick a ripened pineapple that is YELLOW from the base up, however, some are green on the outside in color depending on the species. If the pineapple smells sweet and gives in just slightly to a soft pressing than congratulations! You’ve just found your perfect pineapple!
Now here’s the fun (and delicious part!), you’ll be amazed when I tell you just how just how simple the instructions are in rooting and growing pineapple crowns.
Once you’ve brought your pineapple home, you’re going to start by cutting off the leafy top about half an inch below the leaves. Next be sure to remove some of the lowest leaves. Once that’s complete you can trim off the outer portion of the pineapple top at the bottom of the crown, or stem, until you see root buds. These buds resemble small, brown-colored bumps around the stem’s perimeter.
I brought my pineapple home on a Monday and did not plant my root until Friday. It is absolutely important to make sure it has a few days to dry-some websites recommend a week but I was anxious-before planting. This helps the top of the plant heal and makes it less likely to rot. I also made sure I enjoyed the fruits of my labor, literally and figuratively, by making a delicious fruit salad which consisted of pineapple, mango and grapes. I posted the recipe last week, if you’re interested you can read about it HERE 😍.
There are SEVERAL resources online regarding the how to go about sprouting your plant. There are some people that even claim to have success growing them in water but most (like me) stick to soil. Gardening enthusiasts tend to recommend a light soil mix with perlite and sand. I didn’t use this, rather, I simply used regular soil and said whatever happens, happens. Now that you’ve got your soil, plant the pineapple crown in the soil up to the base of its leaves. Make sure to water your plant thoroughly and place it in bright, indirect light.
I placed my plant outside on my screened in porch table, it gets indirect sunlight via the bamboo blinds I have up over my windows. They THRIVE in hot and humid weather so you can totally get away with leaving your plant outside overnight in the spring and summer months as long as it’s semi-shaded and your local temperatures don’t dip below what is considered first frost. In the winter months, you’ll need to keep your plant INDOORS or it will die according to nearly every gardening YouTuber and blogger I’ve come across in my research.
Remember: don’t get discouraged: pineapples are slow-growing plants, and forget about expecting to see blooms for at least two to three years, if at all. I’ve read about ways to “force fruit” your pineapples plant but I’ll cross that bridge when I get there! In the meantime, I truly hope you have a wonderful weekend, stay safe, stay kind and stay true to YOU!
This will be POST # 1 of the ‘Brittany tries to grow fruit plants at home’ series. Today I’m going to attempt to germinate pineapple seeds that are viable enough to pot in soil. Pineapples are probably the most slow growing plant but also probably one of the most hardiest to care for. They don’t always fruit right away and can take up to 5 years before they start barring anything truly edible. They are a rather tropical and good looking plant to have around. Since I am not exactly trying to grow a pineapple per say, I don’t mind waiting and in the event that one did so happened to bloom I’d happily enjoy the ‘fruits of my labor’-pun intended.
Giving just a little bit of background on myself as a gardener, I do not have a green thumb. In fact, everything I touch dies. A friend of mine raises aloe plants as well as a variety of other plants. When Tom and I helped she and her husband move, she took it upon herself to gift me this little baby aloe plant. I am a serial plant killer, it’s not that I try to kill them but I can follow care directions by the book and still have it dead as a door nail within a week of its arrival to my window sill. Despite my rather desperate pleas to not take it, my adamant testimony that it would probably die in my care, my friend did not budge on her stance of gifting me with the baby aloe plant. She told me, quite plainly, that not even I can kill the hearty aloe plant. I’d literally have to overwater it to kill it. A plant I didn’t have to remember to water daily? Sign me up! I figured I’d give it a go and flash forward to today, I can proudly say I have actually kept that plant alive for three years. Not bad for the girl that kills plants faster than directions say they will flourish in!
My aloe plant
Granted, while my aloe plant is still a little small, (I only recently re-potted it), it is fairly easy to care for. I only have to remember to water it once, maybe twice, a month in the summer and as long as I am making sure it is in a place where it’s getting plenty of sunlight it pretty much thrives all year long-without much assistance from me. Unfortunately for me, the fact that I have actually kept this plant alive for as long as I did gave me confidence to try something a little more complicated-this could be a good thing or bad thing.
Before we delve into the how let’s talk about the what pineapples really are besides a delicious snack. Pineapples are a tropical herbaceous perennial belonging to the bromeliad family. Basically they can grow to about an inch shorter than me at 5’1 putting them at approximately 5 feet in height and 3-4 feet in spread. Believe it or not pineapples were once a delicacy afforded only to the very wealthy in Europe during the 1700s.
What I found most fascinating to learn about these plants is how growing them is very simple. They have extremely tough leaves which lose little water through evaporation. They also have small root systems ( much like other bromeliads), and are not fussy about the quality or quantity of their soil. Anyone who really knows me knows that I despise a needy and picky plant. It absolutely broke all preconceived notion’s that I had regarding my ability to successfully grow one. 
Since they’re not picky and have small roots, they tend to make excellent container grown plants, this is especially awesome for those of us (like me) whose climate is less than tropical. If you do live in a warmer region, kudos to you because growing pineapple plants in the garden is a match made in heaven that you should at least try once.
After researching just how easy they were and how many people were able to keep these bromeliads in various climates I had to wonder: Were pineapples the hip new houseplants for amateur gardeners without green thumbs?
I got my seeds from a store bought pre-sliced pineapple, so the way I see it as whether or not they grow might not have anything to do with how well I follow directions. The seeds just might not be viable, in which case, I’ll try the other more popular method of growing a pineapple from cutting off the crown section and potting it in soil.
Please note that I will be doing an update once a month on how my seeds are doing. I have no guarantee that this will work I am simply trying something a little unorthodox. Typically, much like the lima beans I would grow when I was in elementary school, this could be done by taking a wet paper towel and placing the seeds inside a zip lock airtight bag. However the idea of waiting three months with a moist paper towel that can easily mold inside a bag, inside my house, didn’t really appeal to me. So I did what any ordinary girl in the 21st-century would do, I went on YouTube. 
I stumbled upon a YouTube video by Diane Mumm Garden Videos. In the video ‘How to Plant Pineapple Seeds-grow pineapple from seed’, Diane tries three popular methods for germination. The first batch of seeds she simply planted in soil, the second she placed the seeds in a jar and the third batch she did via the wet paper towel route. Diane did regular updates and it turns out her most successful batch was the ones grown or rather germinated in a mason jar. Without getting into too much detail, you can watch the video yourself here:WATCH Diane’s video HERE!
The method I am going to write about today showed that more productive process. Since Diane found that after trying all three methods the mason jar method worked the best, I figured it would cost me nothing to give it a whirl. It’s important to note, that I may not have anything to plant until September. As I may have previously mentioned, pineapple plants take forever to germinate (as well as fruit) so if patience isn’t your forte, you might want to sit this one out. 
Before we begin, please note my new DISCLAIMER page, by accessing this website you are AGREEING to the terms listed. The step-by-step method I am providing is not guaranteed to work and you should therefore always do your own independent research before trying it yourself at home. Also please note: I am not a gardener but there are plenty of talented and fabulous Youtubers who are excellent gardeners that can answer any questions that you have. Now that that’s out of the way, here’s what you’ll need:
1. A Mason Jar
2. Pineapple Seeds
3. Water
4. Plastic wrap
Most people suggest growing a pineapple from the crown, however this seed method is also, while time consuming, affective from what I’ve seen in Diane’s videos. First thing that I did was I pulled the seeds out of the fruit. When I cut up my pineapple, I took notice of the little (blackish brown in color) dots imbedded in the fruit. These are the seeds so I plucked them out and set them aside.
Once I finished enjoying my snack, I rinsed off the seeds so that they were no longer sticky.  I found this to be a very important step because I did not want to attract fruit flies or gnats by allowing them to smell the sweetness of my pineapple seeds. 
Next, I set aside a clean mason jar. It can be any size as long as it allows ample room for your seeds to germinate. The mason jar I used was medium sized.
Once I had my seeds and mason jar it was time to begin the next step. I placed just a little bit of water at the bottom of the mason jar. I was careful not to use too much as I did not want my seeds swimming or floating around in too much water. Next, I dropped my seeds in, covered the top with plastic wrap, and tilted the jar on its side, gently rolling it. Being careful not to tilt it too much, I did not want any water escaping. I made sure to tilt it until I felt the seeds were spread out, the purpose of this is to avoid having seeds germinate too closely together.
Finally, I placed my jar in a place where it will get plenty of sunlight. I recommend doing this in the summer months because pineapple plants are tropical fruits and therefore thrive best in the summer. During the winter months it is advised to keep them in a sunlit area in a room where the temperature does not drop below 50°. 
Within three months, I should begin to see my seeds begin to sprout. When this happens, I can transfer my seeds to soil. I will be sure to document the next step, providing that mine actually achieve germination. As with anything else, gardening takes practice. It’s trial and error type experience. While I do not have the answer yet to the question I posed earlier in this post, I am convinced I will have one within the next year. I’ll either be successfully enjoying a beautiful indoor pineapple plant or writing about what a failure these processes were for me- there’s no in between when it comes to plants.
As I mentioned before, I do not have the best of luck with plants so therefore I tend to grow ordinary, non fussy, low maintenance plants that are not extremely complicated and complex. While the chances of me actually killing the seeds before they can germinate are also very high, my aloe plant has given me the confidence in wanting to try to grow different fruit plants just too see just how easy it is to do at home. Some of the plants I talk about in this series may die and some of them may thrive. The point of this series will be to show you, the reader, what you can and can’t grow if you have a brown thumb like I do.
Right now, the weather in my part of the globe is very warm and humid so I will be sure to document whether or not I feel this was the best way for someone with little to no gardening experience to grow a pineapple plant. As mentioned, I will also be trying the other method of growing a pineapple from the crown. During this time and at the end of the summer I will be able to, based off of my own experiences, tell you which method I feel works best. As mentioned in my disclaimer it is important before trying this at home that you do your own research what works for me might not work for you and that is OK. Finding your own method is key to finding success with your plants.
Have you ever tried growing fruit plants at home? Leave a comment below and join the conversation! I love to hear from each and every one of you.
One of the most common issues on my iPhone 7 was I couldn’t get through a full day under moderate to heavy use without re-charging my phone about a quarter of the way through the day. I think most smartphone users can agree that despite the fact that our smartphones have so much abilities packed into our devices the battery power after a year or so starts to diminish. However, Apple has technology out now to where you can utilize your battery to the fullest and charge MUCH less often especially on the go.
Many iPhone users are familiar I’m certain with the “Low Power Mode”, which you’ll be prompted to activate it when your phone reaches 20% battery. However, on your iPhone XS Max you can also enable Low Power Mode manually before your phone gets to that point and it will certainly help stretch your battery life further. Here’s how it works.
While in Low Power Mode, your iPhone automatically disables settings like mail fetch, Hey Siri, and other things that people commonly change when they want to make their iPhones live longer between charges. For whatever reason, Low Power Mode is only available on iPhones, not iPads which definitely stinks because I’d love to see how far I could stretch my iPad mini which can go a day and half between charges. Beginning with iOS 11, you can now enable Low Power Mode right from the Control Center.
Usually once your iPhone reaches 20 percent battery power left, you’ll see a “Low Power Mode” prompt appear. Your iPhone will inform you what features will be temporarily disabled, and you can choose to “Continue” and enable Low Power Mode or “Cancel” and not enable Low Power Mode. Low Power Mode can reportedly give you anywhere from one to three hours more time before your iPhone dies but it really depends on what you’re doing with your iPhone.
You can also enable Low Power Mode whenever you like. For example, let’s say it’s the start of a long day and you know you’ll be away from an outlet for a long while.
1. Kindly, tap on battery and drag it down on your new iPhone to utilize your control center.
2. Tap on the battery icon to enable ‘Low Battery mode’
So while I genuinely never personally endorse something I haven’t tried and was surprised that only reviewer seems to have done this. So I took up the mantle myself to give it a try. I don’t have any standardized battery tests that I can do, so I simply spent the last 2 weeks alternating between using Low Power Mode all day, and not using it at all and comparing the differences. My findings are rather remarkable. I decided to put this claim to the test with my iPhone this week and here are my results.
Just a general disclaimer: These were the results of MY findings. The individual findings may be different depending on WiFi availability, and individual phone usage. HOWEVER, I did find that the use of low power mode drastically improved my battery life. As a bonus I left my phone OFF the charger Thursday night into Friday of this past week and left it on Low battery mode. I had a 93% batter at 7 AM when I woke and had a 58% battery by 2 PM, so even with less than a full charge to start my day with I still haven’t even chewed through HALF my battery yet.
In my experiment based on my findings I’d say it most certainly pays to use Low battery mode at all times as there’s a 20-30% difference in battery left over at the end of the day especially if you don’t have constant access to a charger. If you don’t have the newest iPhone don’t despair either-you can manually toggle on your Low battery mode by accessing settings➡️battery➡️Low battery mode and switch it to ON as long as you have iOS 9 or later.
Which features have been your favorite so far? Leave a comment below and tell me what you think!
It has been one week since I bought my iPhone XS Max and the compelling features just keep piling up! Not only is this smartphone incredible in and of itself with so many features, it’s also great for people like me, who love to game on their phone. What I am going to walk you through today is definitely compelling feature number two for anyone who is playing a game on their iPhone and would like to record their game time to share with friends.
Have you ever had an instance where your Friend, Brother, or Mother are stuck on a level of Candy Crush that you beat and you want to be able to show them how to beat it? Now, in the past you would probably have to wait until you saw them to walk them through the level or Google ‘how to’ videos on YouTube but those days are over. What if I told you that you can walk them through it yourself now if you know how to beat the level? You would probably tell me to stop talking about the compelling feature number two and simply show you!
So today I’m going trying things just a little bit differently, I’m going to be putting a video in this thread on how to utilize the screen record button on your iPhone XS max! In order to do that though I’m going to give you directions on where to find this amazing feature!
1. Tap and slide down the battery icon on your new iPhone XS max.
So now as you notice there’s a few different features which I will be walking you through the next couple weeks including what they do, and why they are special. Today, however you are going to look for the Bullseye looking icon which I’ve kindly pointed out with the arrow I drew in the screenshot of my features bar. Once you’ve found this you’re ready to begin!
**Update: the video doesn’t seem to be working on here but if you go to Are You There Friday it’s Me Brittany in Facebook you’ll be able to see it along with this post.**
Ta-da! So there you have it now you know how to record your screen if you ever get the urge to make an impromptu ‘How to Video’ right from your iPhone. This feature also comes in handy when you want to walk somebody through how to access a new feature on their iPhone, I have used it to show some of my friends different features and it does come in handy because I can literally show them with the tap of the button rather than try to explain it over the phone or wait till I see them.
I really hope that you enjoyed this compelling feature number two. As some of you may have noticed I had low battery mode on with 98% battery, there’s a method to my madness as I will be discussing the importance of utilizing low battery mode even when you have a full battery next week and how much longer time you get out of your battery throughout the day by utilizing it.
I really hope you enjoyed this blog post and video! What is your favorite feature that I have shown you so far? Leave a comment below and let’s chat!
I have a confession: Hi, my name is Brittany and I am a closet tech buff. I remember back in 2008 when my husband and I first started dating that was the first time he saw my tech side. We were browsing the Verizon store and I was rattling off facts about different phones pros and cons that impressed even the sales people. More than that my husband was impressed.
He asked me how I knew so much about phones and I explained to him how much technology (particularly Apple products) meant to me. Ever since I received my first iPod when I was 16 in 2005, (the picture you see above) I was an Apple connoisseur. Flash forward now to 2018 at 29 years old I guess you could say I’m pretty knowledgeable at working my way around any type of Apple phone.
I was perhaps just a little anxious to receive my new iPhone XS Max with its absence of the home button and generally much larger screen then I opted for in the past but it was love at first sight. I also adjusted magnificently to the key differences between the iPhone 7 and the iPhone XS Max. I found that it was very user-friendly and simple to navigate. Of course, I could talk for ages about how much I love this phone and how I couldn’t recommend it more highly to anyone but I would rather discuss how there’s a lot more beauty to this magnificent device that actually meets the eye. Over the next few weeks, I’m going to walk you through one hidden feature a week that I found to be helpful and that I think everybody should activate when using their new iPhone.
It’s amazing how far technology has come in the last decade alone! I remember being no older than 13 years old, I had been walking around my Grandmother’s neighborhood with my cousin. We took nature walks and recorded miniature videos on my very first LG flip phone. About halfway through our walk I had realized that we were being followed by a truck and a strange man in it. I was very cautious about this, so obviously when the man pulled up and try to get us to come into his slate grey pick-up truck to help him “find his dog” I immediately saw through the guise. I remember how I yelled no, grabbed my cousin’s wrist and ran. This was the early 2000’s and while my cousin (who was and still is a total sucker for animals) was inclined to believe him I was able to see through this rouse and got us out quickly.
I think about that time in my life, especially now in the age of advanced smartphone technology. I remember trying to snap a picture of the back of his truck on my mediocre camera as I ran only to find it was blurring out the details of the license plate and the truck itself (I mean, I was running for my life after all). It’s a sketchy world nowadays and so this first feature I’m going to discuss is something I am really glad the iPhone has and is something that everybody should have set up but hopefully never have to use.
I’m talking of course of Emergency SOS. You can access the Emergency SOS part of your iPhone XS Max by going into ‘Settings’ (for me I keep all of my apps in a neat little folder customized to my needs).
As you can see it looks like a gear (for those new to iPhone in general) so be sure click it to access the steps on HOW to turn on this feature that could save your life. Once you are IN your settings scroll down until you see the feature marked ‘Emergency SOS’ you can find it highlighted in the picture below.
You’ll find it between ‘Face ID & Passcode‘ and ‘Battery‘, so once you find it go on and click it. Now , once you’re in that feature click the toggle ON to activate ‘Call With Side Button’ as demonstrated below:
What this amazing feature does is if you rapidly press the side button along with the volume button rapidly five times it will immediately (and silently) call emergency services. This feature is obviously being spoken about first because (while hopefully you’ll never have to use it) it could also save your life if there’s a situation in which you cannot swipe to call emergency services.
It is something you should encourage your family and friends to do in the event of an Emergency. Had this feature existed when I was 13 in the early 2002, perhaps we would have caught the guy who tried to lure my cousin and I into his truck. It is something you should immediately activate as a parent on your children’s iPhones (if you purchase it for your teenager or allow your younger child access to your iPhone on short walks to the park or around the neighborhood).
Furthermore, if you look below the set up to activate ‘Call With Side Button‘, You will see that I have my emergency contacts set up. Emergency contacts are essential to set up especially in case of an emergency where you are not conscious. In the Health app which is included on your new iPhone you can set up your personal profile and emergency contacts.
This is what your Health app will look like.
This way, emergency service personnel will be able to access your emergency contacts and call them from your phone even if it’s locked to alert them if something has happened to you. Setting them up is easy and also setting up a profile for yourself (which includes name, date of birth, blood type, weight and list of any medical conditions and allergies you may suffer from) is just as easy as well and I encourage you to do it because it gives emergency services responders key information that can help save your life quicker. Most to all of the new iPhone models will walk you through what to do the first time you access it so I really don’t have to post directions here.
Go into Health, click on Medical ID located on the bottom right (highlighted by the square box in the picture below) of the app to fill out your profile and set up emergency contacts. Once you have both in place, you will be able to see your Emergency Contacts in the Emergency SOS settings of your iPhone like mine is in the picture above.
I cannot stress enough for taking precautionary measures which could save you or a loved one’s life in the event of an emergency and strongly suggest you take the five minutes out of your day and set this amazing feature up.
On next Friday, we will be discussing how to record your screen activity on your iPhone. This is really fantastic for gamers who want to do tutorials that can now do this straight from their phone. I will show you how to set it up and access it! So be sure to stick around for compelling feature number 2 on the iPhone XS Max.
Are you, or someone you know, interested in getting an iPhone XS or XS Max? Is there another hidden feature that you found that you’d like me to talk about over the next couple weeks? Leave a comment below, I LOVE to hear from you all!
An Affirmation Page for your Bullet Journal I’ve been slacking with making sure my scheduled posts are posted on Friday this last week and half. In my defense I have a serious obsession with bullet journaling and yes I know I’m late to the game. I purchased my Happy Planner, which is a Journal/Planner/Scrapbook hybrid and so super easy to personalize and get creative with! For me, it’s been relaxing and therapeutic being able to get it all out there. Each week I do something called a “Brian Dump”. Now generally, a brain dump consists of “to do”‘s but that’s WAY too mainstream for your girl Brittany. That’s why I use my brain dump for affirmations; last week I did positive affirmations about myself, and this week? Well, this week I asked family and friends to describe our friendship/relationship in ONE word. It was harder then it sounded for some of them but the responses I got were so genuine and loving that it humbled me greatly to see a glimpse of myself through their eyes and I immediately felt blessed. An affirmation brain dump is really easy to put together there’s really maybe five steps tops and tonight I’m going to show you how it’s done!Here’s what you need:1) Create 365 ‘The Classic Happy Planner Daily Planning Refill” ($4.99 at Michael’s Craft Store)2. A Cellphone with text message/text reaction abilities. (I have an iPhone 7)3. Computer and Printer4. Colored pencils, glue stick, scissors and sharpie pens (fine point)5. Creativity! OK so the first thing you need to do is make sure that you have done daily planning refill pages which you could pick up at any Michael’s/ AC Moore Craft Store for five dollars. If you sign up for Michael’s for rewards you could keep an eye out for coupons which lower the prices greatly and get it for even less. What I really love about these pages is that they come pre-hole punched so you don’t have to worry about it, also what I love about the happy planner is you can add as many different pages and cover a wide variety of topics to your journal as you’d like (you may need to invest in some expansion disks though as your book gets filled up) and each of the daily sheets have a brain dump that you can use and just allow your creative juices to flow.Now that you’ve got your page set, decorate it, there’s no wrong way as long as it’s pleasing to your eyes. Once you’ve got your page decorated to your heart’s content text your family and friends and ask them to describe your friendship/relationship in one word. As they respond screenshot and crop their responses then send them in an email attachment to yourself. When you save the pictures from your email rename them the person who gave you that response’s name. Finally, print all of your text message bubbles out using the format of contact sheets (it’s the one AFTER wallet sized) and print. You may also do what I did depending upon the size of paper you are using for your brain dump and print out a few responses that come in in wallet sized format to give more of a dynamic in different sizes of responses in your collage.Once you’ve printed out all of your responses, glue them using a glue stick and arrange them however you see fit onto the paper. Once your responses are dried on to the page you can place your page back into the book and there you have it! An affirmation page you can appreciate for YEARS to come!Are there any bullet journaling DIYs you want me to try and post on here? Leave a comment below and tell me what you’d like me to try!Love you. Mean it.Brittany
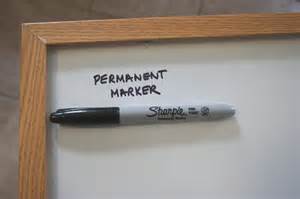
Dry Erase Marker Takes Sharpie Marker Off A Dry Erase Board
It all began in an epic rush to get ready for work, I grabbed a marker and quickly scribbled tonight’s menu on the dry erase board for my husband to see and run to the grocery store if need be. It wasn’t until I was on my drive home that I got the dreaded text: ‘sweetheart, got the things we needed but the board won’t erase…did you use a Sharpie?’ that I realized I had. My immediate instinct was to mourn the loss of a relatively new dry erase board (two years old) but with tragedy comes opportunity when I remembered this life hack I found on Pinterest which proposes regular dry erase maker when rubbed over the offending sharpie stained board comes right off, and I thought, why not? So off we go back to Brittany’s Life Hack Lab to test out the theory that regular dry erase marker removes permanent marker from a whiteboard.
Hypothesis: regular dry erase maker removes permanent marker from a whiteboard .
Theory 1: I will notice minimal removal but will need to chuck out the board and buy a new one.
Theory 2: Don’t even bother! It doesn’t do what it claims for all the hype it received on social media.
Theory 3: It worked! My board is saved!
So now with all our possible outcomes laid out, let’s go over what you’ll need:
*A Dry Erase Marker
*A Stained Whiteboard
*A Mr. Clean Magic Eraser
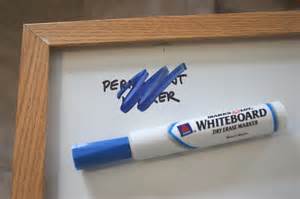
You apply a dry erase marker over the permanent marker. You may also be able to get rid of a Sharpie stain by coloring over it with regular blackboard chalk which worked once when one of my students colored on the class whiteboard with Sharpie. I’ve heard this method works best if the stain is on a dry erase board or similar surface, such as a window or computer screen but I didn’t try the latter.
Step 1: Color over the Sharpie stain completely with the dry erase marker.
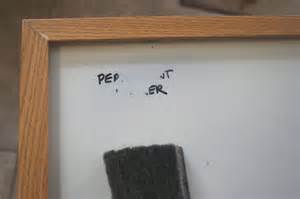
Step 2: Wipe the colored area with a paper towel.
Step 3: Repeat as needed until the stain lifts away.
I found my board was very much saved by this life saving hack. The hack itself explains that this is because this is due to the chemicals in the dry erase marker which cling to those in the permanent ink, that forces it out of the surface and away. Is this a miracle hack that can save your board? Yes, I am going to personally add this hack into my things which work category, it stood up to my test as noted above.
I CAN honestly say though that my in addition to it taking the sharpie off, a once over with Mr. Clean Magic Eraser can also insure there’s no residual staining if you ever use a marker like red by mistake. Therefore, for now I got to go with Theory 3, it did save my board and my wallet from having to buy a new one.
Have a life hack you want me to put to the test? Leave a comment below as I love hearing from you!
What’s the first thing people notice about you when you shake their hand? Chances are if your smile is not the first thing they notice it is ONE of the first things they notice. Did you know habits like smoking, excessive coffee drinking, and even inconsistent dental hygiene habits like forgetting to floss can do a number on your teeth? With brands like Colgate Whitening Strips and other supposed whiteners it’s easy to just buy and go, however, what if I told you that you don’t need to buy the store brand to get instantly whiter teeth?
That’s what this life hack I found on Pinterest proposes and with such a easy shopping list and the things I needed to test it already in my house, I thought, why not? So off we go back to Brittany’s Life Hack Lab to test out the theory that mixing baking soda with a mashed up strawberry will give me whiter teeth.
Hypothesis: Mixing a strawberry with half a teaspoon of baking soda will create a paste that will whiten your teeth when left to sit for 5 minutes.
Theory 1: I will notice minimal changes but will need to do this consistently to see real results.
Theory 2: Don’t even bother! It doesn’t do what it claims for all the hype it received on social media.
Theory 3: It worked! Move over Colgate there’s a new sheriff in town!
So now with all our possible outcomes laid out, let’s go over what you’ll need:
*1/2 Teaspoon of baking soda.
* A Strawberry Mashed up.
* A Toothbrush to spread the paste on your teeth.
* A timer set for 5 minutes.
The mixture tastes like a salty fruity combination so its not too hard to tolerate for 5 minutes, I’m not sure I mashed my strawberry enough either so that may affect the overall outcome of your results, but I definitely feel this paste is doing something, especially along my gum line where it’s stinging just a little but nothing intolerable.
What your mixture will look like.
Well 10 seconds left, let’s wash this off!
Don’t mind my goofy face 😛
You do this by using your toothbrush and regular toothpaste, to brush your teeth. And the results? I found my teeth were whiter although I never really had horribly stained teeth to begin with but I would recommend it if you’re looking for a sure fire way to gradually whiten your teeth to add it into your evening brushing regiment. The hack itself explains that this is because Strawberries contain malic acid which removes stains from teeth. Is this a miracle solution that will reverse years of stains and damage to your teeth? Yes and no, yes in a sense that I feel it does and will work but not if you’re looking for instant results you’ll be sorely disappointed. I am going to personally add this hack into my evening brushing routine and check back in for an update next month to post my final verdict.
I CAN honestly say though that my teeth feel cleaner (like dentist clean) and look shiner in addition to a bit whiter. I am also prone to getting minimal plaque build up by the gum line no matter how much I brush (it’s genetic not because of lack of brushing and flossing) and I did notice that the strawberry/baking soda paste got rid of it quite nicely. Therefore, for now I got to go with Hypothesis 1, I noticed minimal changes and will be doing this consistently to give you the scoop of whether it’s worth your time or not.
Is there a life hack you’ve read that you want me to put to the test? Leave a comment below and I’ll get back to you since I do love hearing from all of you! Happy Whitening!
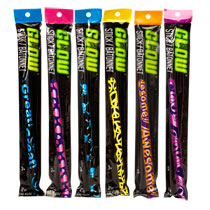
I love Summertime, it’s a prime time for parties, gatherings, and BBQs some of which stretch long into the night. Some of my most fond memories growing up were night swimming in my parents’ large in-ground pool, swimming up to the large light and slapping the water to make gold bubbles, I also remember tiki torches lighting up the night. While I do not have a pool at my home or a large budget with bills to pay, when I do someday get my pool I’ll need atmosphere for parties and such. Yes, I could go out to Home Depot to invest in some tiki torches perfect for a night swim accent, but why do that when I could also create some homemade accent lanterns without breaking the bank? The materials you need are simple but perhaps more simple then that is how to put them together.
1. First we bought some white balloons (seen above) and I blew them up while Tom cracked some glow sticks (also pictured above) so they glowed.
2. We then stuck two glow sticks inside each balloon. Note: this WILL make your balloon deflate a bit, so be prepared to blow it up a bit afterwards and don’t forget to tie a knot.
Tada! You’re Done! They glowed for approximately 6 hours, while we sat on the patio hosting our friends this evening and the best part was they were only $2.00 to purchase and put together! Would you or have you tried this simple DIY project? Leave a comment below, I love hearing from you!
Okay, so I love life hacks probably more than your average person, originally when I set out to create this blog it was going to be solely me testing out life hacks to either boost or diminish credibility to them. However, I decided the variety is always best when it comes to blogging, especially with so many competitors out there. I’ll often stumble across on Pinterest helpful tips and tricks which seem too good to be true. Some of these tricks I’ve found work, others I’ve found may work under certain circumstances but might not always ring true.
One particular life hack which caught my eye while I struggled with writer’s block this week was that hydrogen peroxide could remove blood stains. Now it just so happens I have some blood stained pants (pre washed of course, but stained nonetheless) and some hydrogen peroxide lying around my house. It must be noted that this hack is not very specific about how soon after your clothing becomes stained you need to apply the hydrogen peroxide so like any good scientist, I must first perform a hypothesis:
Hypothesis: If I apply hydrogen peroxide to my blood stained pants the peroxide will remove the offending stain from my pants and make them like new.
Theory 1: The stain is old and having gone through a cycle of wash and dry will remain due to the lack of action upon first receiving the stain.
Theory 2: The peroxide when applied to a fresh stain will help lift the blood for the washer/dryer but not remove it.
Theory 3. It works!
Now that I’ve proposed the hypothesis and three possible outcome theories I will tell you what you need:
1. An article of blood stained clothing FREE thanks to your recklessness.
2. Hydrogen Peroxide which could be picked up at your local dollar store for $1.00
Total Expenses: $1.00
Here’s What I did…
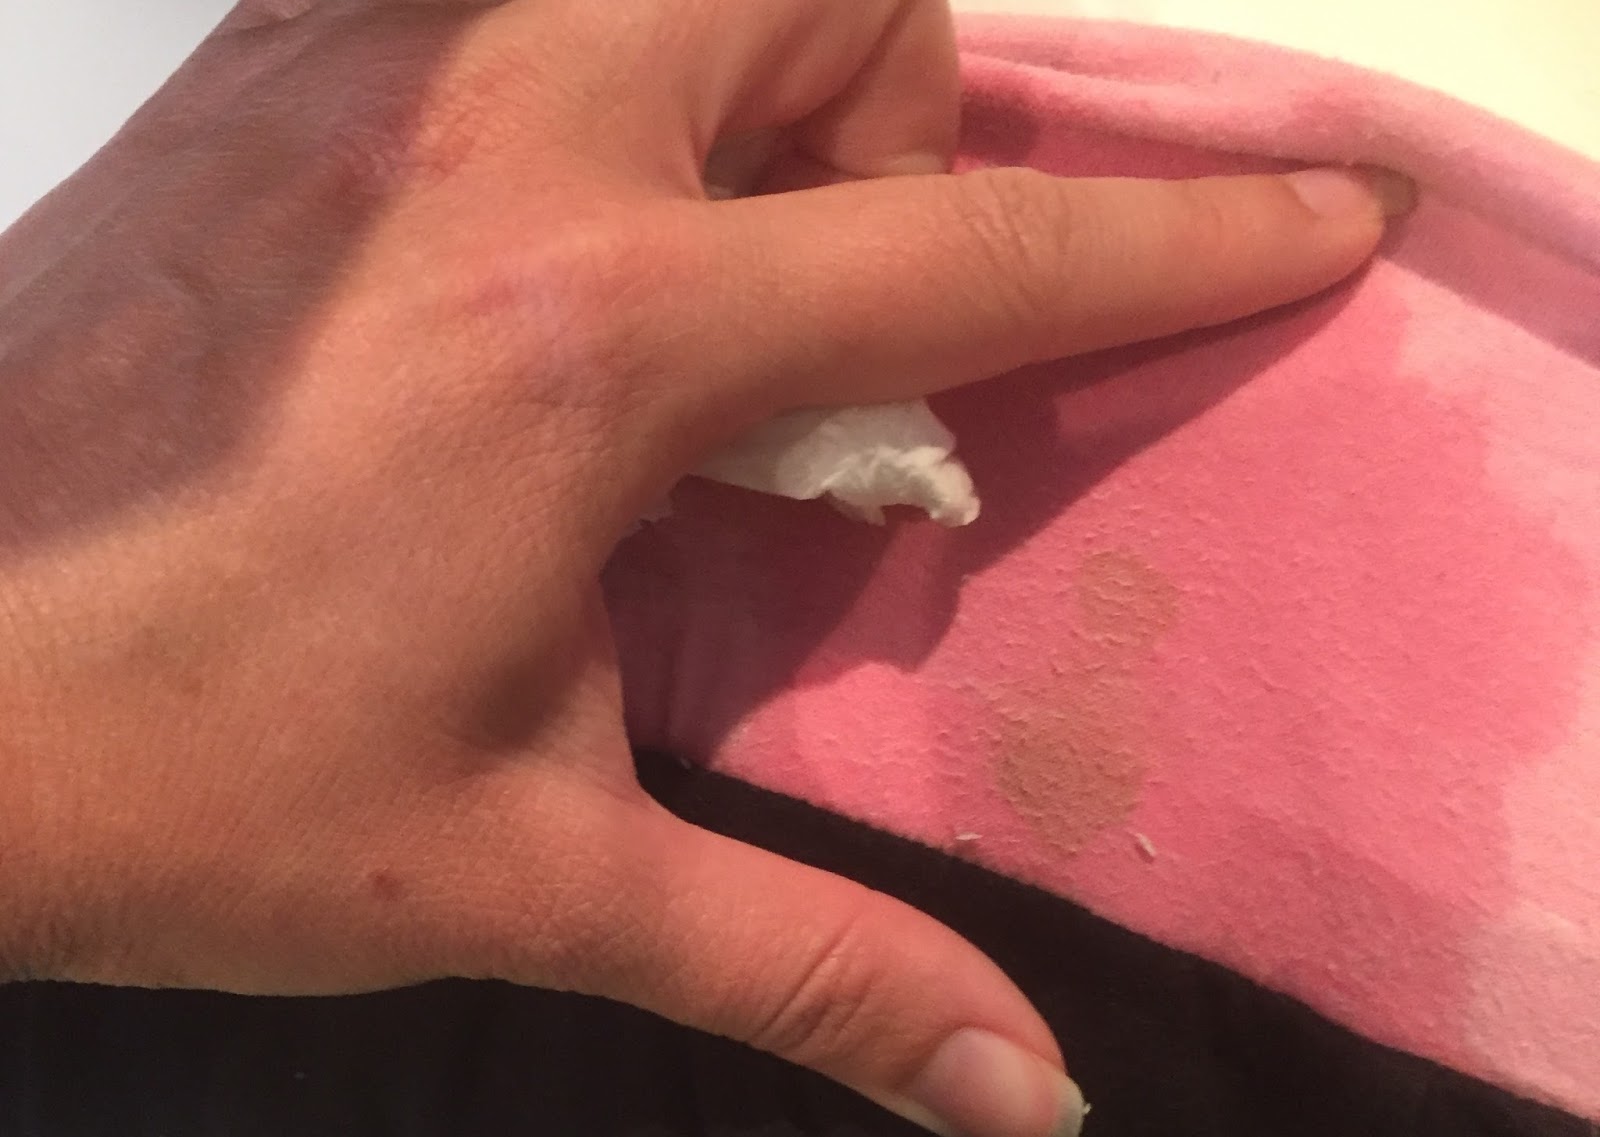
1. Propped the offending pair of pants with the dried stain against my bathroom sink. You can see what I’m working with in the picture below.
2. I doused the stain in Hydrogen Peroxide and let it sit for 5 minutes.
3. FIRST I tried rubbing the stain out but as you can see below I don’t think this helped a whole lot.
4. NEXT I tried something different, after re-soaking the stain, I took out your standard blow dryer and applied heat directly onto the stain.
5. Voila! While the stain isn’t completely gone, it’s nearly invisible to the naked eye and after a few more repeats of steps 1-4 it was starting to vanish.
My verdict: While this life hack DOES work, I feel that it would have worked even better or removed it completely with minimal repetition if done immediately after receiving the stain in question.
Have you or will you try this life hack next time you find a blood stain on your clothes? Leave a comment below discussing your thoughts and suggestions, I love hearing from you!
Love you. Mean it.
Brittany
xoxo
Exactly like 1st Grade Where You're Told To Keep A Journal… Just Add Adulthood.


 I’ve been slacking with making sure my scheduled posts are posted on Friday this last week and half. In my defense I have a serious obsession with bullet journaling and yes I know I’m late to the game. I purchased my Happy Planner, which is a Journal/Planner/Scrapbook hybrid and so super easy to personalize and get creative with! For me, it’s been relaxing and therapeutic being able to get it all out there. Each week I do something called a “Brian Dump”. Now generally, a brain dump consists of “to do”‘s but that’s WAY too mainstream for your girl Brittany. That’s why I use my brain dump for affirmations; last week I did positive affirmations about myself, and this week? Well, this week I asked family and friends to describe our friendship/relationship in ONE word. It was harder then it sounded for some of them but the responses I got were so genuine and loving that it humbled me greatly to see a glimpse of myself through their eyes and I immediately felt blessed. An affirmation brain dump is really easy to put together there’s really maybe five steps tops and tonight I’m going to show you how it’s done!Here’s what you need:1) Create 365 ‘The Classic Happy Planner Daily Planning Refill” ($4.99 at Michael’s Craft Store)2. A Cellphone with text message/text reaction abilities. (I have an iPhone 7)3. Computer and Printer4. Colored pencils, glue stick, scissors and sharpie pens (fine point)5. Creativity! OK so the first thing you need to do is make sure that you have done daily planning refill pages which you could pick up at any Michael’s/ AC Moore Craft Store for five dollars. If you sign up for Michael’s for rewards you could keep an eye out for coupons which lower the prices greatly and get it for even less. What I really love about these pages is that they come pre-hole punched so you don’t have to worry about it, also what I love about the happy planner is you can add as many different pages and cover a wide variety of topics to your journal as you’d like (you may need to invest in some expansion disks though as your book gets filled up) and each of the daily sheets have a brain dump that you can use and just allow your creative juices to flow.
 Now that you’ve got your page set, decorate it, there’s no wrong way as long as it’s pleasing to your eyes. Once you’ve got your page decorated to your heart’s content text your family and friends and ask them to describe your friendship/relationship in one word. As they respond screenshot and crop their responses then send them in an email attachment to yourself. When you save the pictures from your email rename them the person who gave you that response’s name. Finally, print all of your text message bubbles out using the format of contact sheets (it’s the one AFTER wallet sized) and print. You may also do what I did depending upon the size of paper you are using for your brain dump and print out a few responses that come in in wallet sized format to give more of a dynamic in different sizes of responses in your collage.
 Once you’ve printed out all of your responses, glue them using a glue stick and arrange them however you see fit onto the paper. Once your responses are dried on to the page you can place your page back into the book and there you have it! An affirmation page you can appreciate for YEARS to come!
 Are there any bullet journaling DIYs you want me to try and post on here? Leave a comment below and tell me what you’d like me to try!Love you. Mean it.Brittany