This week Tom and I made a recipe we found on Pinterest called Crack Chicken. You slow cook it in the Crock Pot and the best part is it’s keto friendly and low carb. But you don’t have to follow a low carb lifestyle to enjoy it. The whole family will love this creamy, cheesy chicken dish!
Ingredients:
• 1/2 cup chicken broth
• 1 Hidden Valley Ranch seasoning packet
• 2 pounds of defrosted chicken breasts
• 8 oz package of Philadelphia Cream Cheese cut into chunks
• 8 slices cooked and crumbled bacon
• 1/2 cup shredded cheddar cheese
Instructions:
1) Add chicken broth to the slow cooker and stir in a Hidden Valley Ranch seasoning packet. Then add defrosted chicken breasts to the crock pot.
2) Cook and cover for 4 hours on HIGH or 8 hours on LOW.
3)After the cook time has ended, shred the chicken with two forks.
When you shred the chicken, it will absorb any leftover liquid.
4)Add in the chunks of cut up Philadelphia Cream Cheese, bacon and shredded cheddar cheese. Stir all of the ingredients together
5)Cover the crock pot again and leave in for an additional 5-10 minutes until the cream cheese has melted.
While you can serve this Keto Crack Chicken in the Crock Pot on it’s own or with a side salad, I think it would be wonderful served over a portobello mushroom or a pepper stuffed pepper style. If you’re feeling up for it you can also serve this chicken in lettuce wraps for a low carb meal. It’s so versatile the possibilities are endless!
Tom and I ate ours on its own, and not only was it charmingly delicious BUT super filling! You can see the nutrition facts below and see it clicks in at only 1 gram of carb.
What’s your favorite low carb recipe you’d like me to try? Let me know in the comments below!
We all have that meal growing up that we ate entirely too much of. For my family it was pasta. Growing up, my Mother made spaghetti or macaroni and meat sauce at least twice a week. It was fast, easy and budget friendly for the family of four. Occasionally for a special occasions my Mother would make her famous meatballs and pair either macaroni or spaghetti with that. While it wasn’t my most favorite meal in the world in general despite how delicious my Mother’s cooking was and still is I have a lot of fond memories gathering around the table with my Mom, Dad and Brother eating pasta.
Since I’ve adopted a low-carb lifestyle I have found that not only do I not miss pasta but I also do not miss the heavy feeling in my stomach after I eat it. Now that football is back in season, we spend a lot of time with my father-in-law on Sundays. It’s a time that my husband, myself and his entire family get together to watch the Sunday game and enjoy a nice meal. Unfortunately for me week one the side dish was spaghetti. However, this year I was prepared, I had in my arsenal Green Giant’s veggie spirals zucchini noodles OR zoodles as I call them.
One serving of zoodles or, 3/4 of a cup, equals out to 1 Net g of carb! You heard right, while the count of carbs is actually 2 g the 1 g of dietary fiber subtracts and makes it come out to only 1 net gram of carbs.
Very much like when I made my low-carb piña colada, I set the bar kind of low with my expectations after all zucchini is a little more soggier than pasta so while I expected it to be a decent replacement I wasn’t holding my breath. The verdict? I was pleasantly surprised with just how delicious it was and I did not feel like I was missing out in the slightest. In fact paired with tomato sauce, Parmesan cheese, and two meatballs I felt like I was enjoying the same thing that everybody else was (minus the carbs and the rock in my stomach afterwards). The zucchini noodles were just the right amount of firmness to hold up in the sauce yet soft enough to where it wasn’t crunchy chewing them.
I enjoyed it so much that I’ve made it a staple in my freezer to have them on hand just in case pasta is on the menu at my Father-in-law’s. There’s lots of recipes I’m excited to make and try with these and I will be posting them as I experiment in the future. I will say as a woman who grew up with former pasta junkies, while nothing will really taste just like pasta did, Green Giant’s veggie spirals are better and leave you feeling MUCH more lighter afterwards.
The 4-1-1 Recap:
Overall Grade: B+
Stars:⭐️⭐️⭐️⭐️
Price: $3.48
Carb Count: 2 grams – 1 gram of dietary fiber = 1 net gram of carbs.
You can find these zucchini noodles in the frozen food aisle at any super Walmart, ShopRite or local go-to grocery store near you!
Which food did you eat so much of growing up that it nearly burnt you out? Leave a comment below and until next week…
What if I told you that you can still enjoy that summertime taste of a Pina Colada WITHOUT all that extra sugar, carbs and calories? You’d probably wonder how on Earth I pulled something like that off. Well I didn’t do it alone, while I was surfing the world of Pinterest I came across this recipe on LowCarb-ology and knew I had to just try it. You can find it by clicking the link here: (https://www.lowcarb-ology.com/pina-colada-cocktail-thats-low-carb/#lowcarb_pina_colada_cocktail) OR you can continue reading this and find out how I tweaked the original and made it even better as well as made a dessert type drink out of it to try on the weekend.
I was ALWAYS making them for Family& Friends!
Pina coladas are special to me, I remember I enjoyed my first pina colada at 15 years old when I went to a summer luau with my Aunt, Uncle and Cousin. My cousin and I were amazed that the bartender catering the event even “served” us. Despite the fact that there wasn’t a drop of alcohol in it, I was immediately hooked on the taste of it. As the years went on booze was eventually (legally) added in and if I was out on the town drinking alcohol it was a frozen Pina Colada cocktail. I fell in love with the creaminess and the flavor at that luau at 15 years old.
Growing up on the Jersey shore it was the perfect drink to sip at the outdoor bars while listening to the sounds of loud music echoing from inside the bar, people loudly chatting, seagulls squawking and boats racing up and down the Barnegat Bay. On my honeymoon I spent a lot of time at this local bar and grill called LuLu’s Bait Shack in Fort Lauderdale. They had this amazing Pina Colada that were served in a souvenir glass, which you got to keep. They were DELICIOUS! I was happy to reuse and be able to take home with me the tall glass shaped like a bikini body for the longest time — I don’t know what happened to it.
Since starting my low carb lifestyle I don’t really drink, besides even without the rum a genuine pina colada alone can range from 65 to 7 grams of carbs and that alone is enough to take a step back from something I once loved.
One of these bad boys is 65 grams of carbs…
It was then I knew I needed to find a way to have my pina colada and drink it too. Enter Pinterest and the lovely link I provided you with above for the original. I learned from Low Carb-ology just how valuable water enhancers are and while I initially scoffed at the author’s claim that it changed the way she looked at cocktails, I am now very inclined to agree. While I’ll freely admit, I was weary of a water enhancer that would supposedly taste like the real thing I have got to say Dasani REALLY delivers in my book . Margaritaville (as in the wonderful company which gives you alcoholic mixers and fancy blenders) also has several frozen drink inspired water enhancers all only 1 gram of carb but I love Dasani because their water enhancers are 0 carbs and soooo delicious. Whenever I am in Shop Rite or my local super Walmart I check out the water enhancers and am super careful to read the label on each one to see what flavors are available.
Me in 2014 enjoying the real thing…
Much like the author of the original recipe, I have totally replaced fruit juice in my cocktails with water enhancers and you can’t tell the difference.
When I came across this recipe and realized I basically had everything I needed in my house already just imagine my excitement. When I set out to follow the recipe I tried to keep in the back of my mind to keep my standards kind of low because there of been plenty of things that I’ve tried to make low-carb (some of which I am still trying to find mimic some of the tastes I miss so much) but don’t deliver.
That said, I never share with you guys what I feel like doesn’t deliver, so that fact that I’m writing it gives it away as gold. I actually did a Facebook live video the first time I made this drink and looking back and re-watching it I can see the trepidation I had in taking my first sip. I expected to be let down, however, I was not as this cocktail is nearly identical in flavor and texture to my favorite Pina Colada! I haven’t exactly tried it with the alcohol yet, however, the original author has and claims that it packs a powerful punch very much like the original and I take her word for it.
Now while I tried this recipe and thought it was fantastic, it got my wheels turning. I wanted to make it my own and so I tweaked it in a way that made it totally Brittany and I think you’ll all agree mine is better (no offense low-carb-ology).
My Facebook Live video; excuse the quality!
Now what I love most about this recipe is I can dress it up and make it a low-carb dessert shake or dress it down to essentially NO carbs and have it taste nearly identical to the original pina colada. The choice is yours and that’s the beauty of it. My husband has a ritual of chocolate chip cookies and milk each night and my new ritual is this gem of a recipe where I truly feel like I’m treating myself minus all the sugar, carbs and-Oh yeah, guilt!
Anyway, if you like Pina Coladas and getting caught in the rain…(now I’m singing this song in my head, just great!) you are going to love this low carb Pina Colada cocktail! Hey make sure drink responsibly — don’t drink and drive. There’s too much at stake and lives that can be destroyed!
A blender or magic bullet (I have the latter and genuinely recommend it)
Okay, great, now how do I make it?!
1. Combine 2 oz of heavy cream, 4 oz of water, 2 tablespoons of Dasani pineapple coconut water enhancer, and 4 ice cubes.
Dessert Style (I ran out of whipped cream sorry)
(Dessert Style: If you want to dress it up, combine the 2 oz of heavy cream, 4 oz of water, 2 tablespoons of Dasani pineapple coconut water enhancer, with 3 oz of rum (optional), 2 tablespoons of Breyer’s low carb vanilla ice cream and a splash of whipped cream. Top it off with the 4 ice cubes.)
2. Blend on high until smooth and creamy.
3. Pour in a fancy glass and garish with a maraschino cherry.
Super delicious!
Nutrition Facts
1. Original version: 0 grams carbs, 0 sugar
2. Dessert Version: 2 grams Of carbs, 4 grams of sugar.
What’s your favorite island style drink? Leave a comment below and tell me what you’d like to see me make low carb!
One thing I miss most about my lifestyle change is cookies. Let’s face it, I’m a sucker for some sweets and there are days I truly miss the taste of a delicious chocolate chip cookie and a tall glass of milk. When searching for a recipe that would satisfy my sweet tooth I was determined to find one that wouldn’t compromise taste or allow me to be breaking any rules. So in being honest, there are more keto chocolate chip cookie recipes on the internet then there are fish in the sea and I’m willing to take that statement to the bank. Some looked okay and some looked way too dry either way I went through a great deal of pins until I found the one I wanted to try.
When I came across this particular recipe on Pinterest, I thought, ‘why not?’ and decided to try my hand at these super delicious looking keto chocolate chip cookies. While I willgo on record and say they were fairly good, I will be tweaking this recipe further because it did have a slightly bitter taste to it (although I think I added too much Sweet N Low to mine). I ended up storing mine overnight in the refrigerator and it took the bite out of bitterness, they were definitely a treat to pick at during the week and it didn’t affect my weight negatively. So without further ado let’s get down to business and give you what you stopped by for, the recipe of course! Please be sure to follow this recipe exactly and let know if yours turned out any better than mine did!
What you’ll need:
• 1 ½ Cups of Almond Flour
• ½ Cup of Salted Butter
• ¾ Cup of Natvia (or Erythritol)
• 1 tsp of vanilla extract
• 1 egg
• ½ tsp baking powder
• ¼ tsp salt
• ¾ Cup Hershey’s sugar free chocolate chips
Got it! So now what?!
1. Preheat your oven to 355 F and nuke the butter for 30 seconds, the goal is to melt the butter but not make it hot.
2. Now that butter you just melted is going to get tossed into a mixing bowl and be beat with the Natvia. Once it’s mixed all harmoniously you’re going to add the vanilla and egg while mixing on low with a hand mixer for exactly 15 seconds.
3. Great! So far so good! Now you’re going to take your almond flour, baking soda, salt and mix it until it is well combined.
4. Press that dough together and remove from the bowl. Combine the chocolate chips into the dough with your hands (ha! And you thought you weren’t going to get messy).
5. Roll that dough to make 12 balls and place them neatly on a baking tray. Bake them for 10 minutes.
6. Let them cool, and serve them up. Store them in an airtight container in the refrigerator they’re even better cold!
Total Time I Spent in the Kitchen Cooking and Prepping: 20 minutes
Total Time I Spent on the Couch Watching Simpsons Reruns: 30 minutes
NUTRITION FACTS
CALORIES 168
CARBOHYDRATES 2.3 g
FIBER 0
PROTEIN 4 g
FATS 17.3 g
Overall thoughts: When I sent Tom to the store he picked up the closest thing to Natvia, which was apparently Sweet N Low. This gave my cookies (as mentioned above) a slightly more bitter taste. Since I didn’t follow the recipe exactly and added too much Sweet N Low so I HIGHLY recommend not being a hero and following recipe exactly what it calls for. Overall since I messed it up and they were still eatable I’m going to give them 3.5/5 stars.
What’s your favorite low carb snack/ dessert? Leave a comment below and tell me your favorite low carb recipe OR tell me your favorite regular dessert recipe and challenge me to create a low carb version of it!
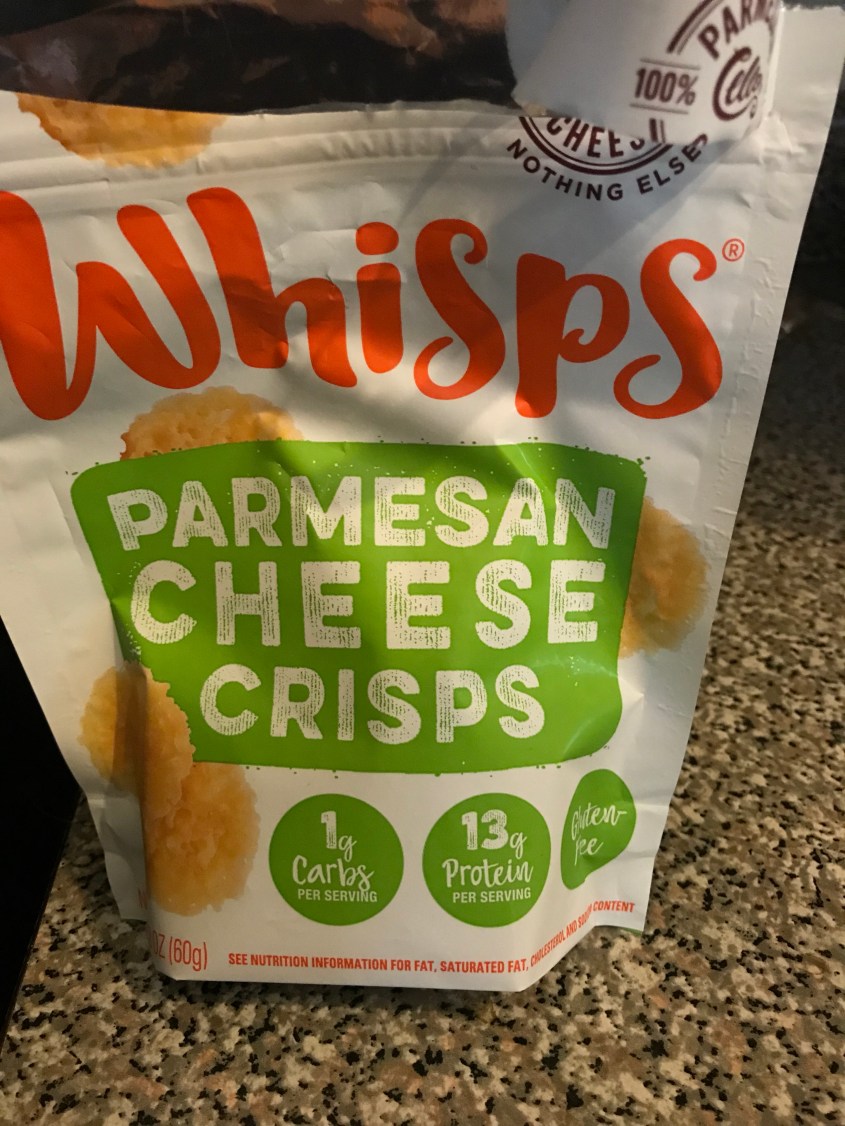
Okay so ask and you shall receive! I know you all wanted another recipe and I’m late posting but I’m spending the weekend on the go with my niece and nephew so unfortunately a full fledged recipe isn’t in the cards BUT I can give you the next best thing, my favorite “go to” snack between meals, and that’s Whisps.
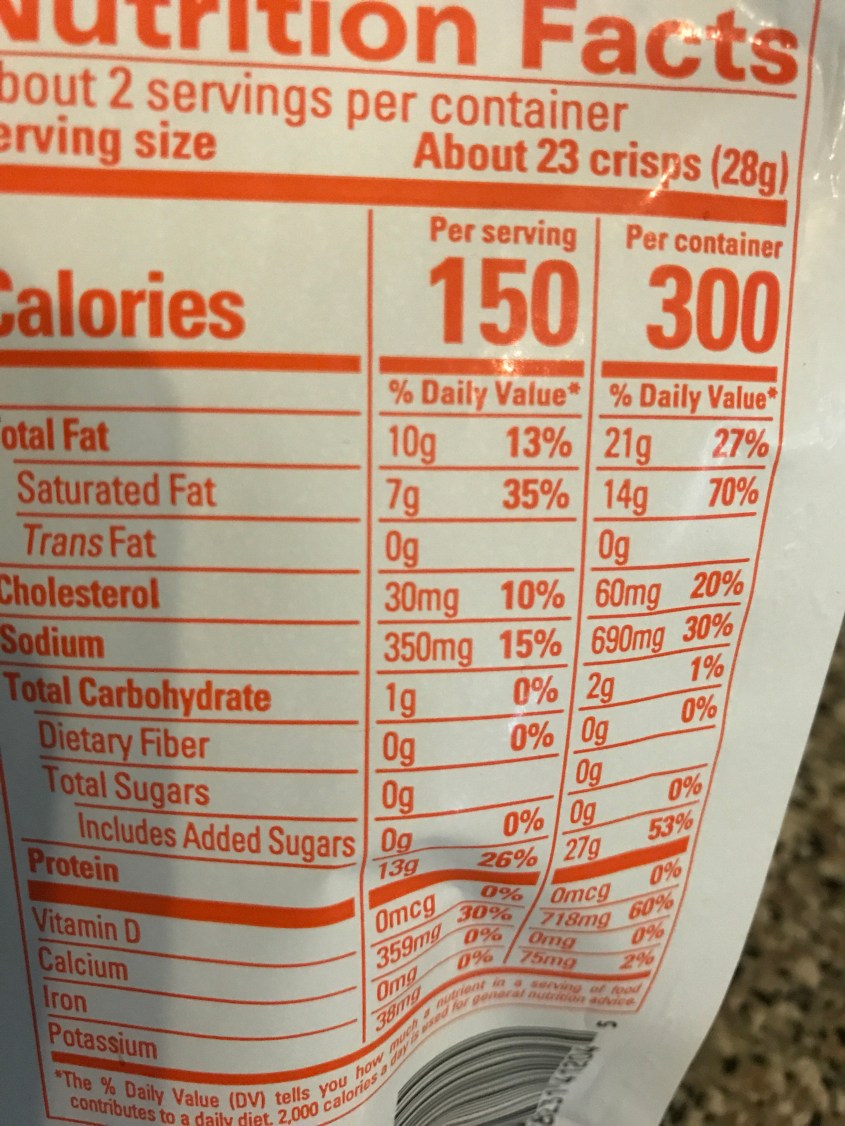
Whisps are fantastic if you’re following a low carb lifestyle, they’re made with 100% REAL Parmesan cheese AND they’re only 1 Gram of carb per serving. Don’t believe me? Check it out!
Now I know what you’re thinking…that’s great Britt but what about the taste? They taste like Cheese It’s in my opinion but why stop at my opinion? Since kids are the most honest human beings on the planet I gave one Whisp a piece with their Mac and Cheese to Elsie and Ben and here’s what they thought:
“They taste like Cheese It’s, they’re really good!”-Elsie
“I don’t really like Cheese It’s but these are okay.”-Ben
Oh from the mouths of babes, if they like them you’ll like them for sure! You can find them at most super markets including ShopRite and Super Walmart. They’re a little pricey for such a small bag ($3.99) BUT they do last you a while!
Question of the Week: What’s your favorite low carb snack?
I’m ALWAYS on the hunt to try easy and delicious low carb snack foods. I found this recipe online at poshinprogress and decided to give it ol’ college try. I don’t miss bread but I do sometimes miss scraping the extra bits of marinara sauce from my plate with some garlic bread sticks. Overall, the recipe was simple and easy to make and tasted pretty stickin’ good too if I do say so myself. I’m convinced the only reason Tom wouldn’t try it is because he watched me make it and knew vegetables were a HUGE part of these tasty suckers.
I found I added more seasoning powder because I am not particularly one for cauliflower or sweet potatoes plains but use your own tastebuds as your guide. Ready? Let’s go!
Here’s what you need!
1 bag of Green Giant riced Cauliflower (2 net carbs)
• 1/2 teaspoon dried Italian seasoning
• 1/4 teaspoon each of garlic and onion powder
• 2 large eggs, beaten
• 1 cup shredded Cheddar and 1 Cup of Mozzarella cheese (about 8 ounces total)
• 1 cup shredded Parmesan (about 5 ounces)
• Kosher salt and freshly ground black pepper
• Marinara sauce, for dipping
Directions
• Preheat the oven to 475 degrees F. Line a rimmed baking sheet with parchment and coat with cooking spray.
• Prepare your riced cauliflower by making sure it’s thawed before transferring the cauliflower mixture to a large bowl. Add the Italian seasoning, garlic and onion powder, eggs, 1 cup Cheddar and Mozzarella cheeses, 1/2 cup Parmesan, 1/2 teaspoon salt and a few dashes of pepper and combine until the mixture holds together when squeezed.
• Spread the cauliflower mixture into an 8-by-12-inch rectangle about a 1/4 inch thick on the prepared baking sheet. Use the straight edge of the parchment as your guide to keep the cauliflower mixture edges straight too. Bake until the crust turns golden brown all over, 18 to 20 minutes.
• Remove the baking sheet from the oven and lay another piece of parchment on top of the crust. Fit a second rimmed baking sheet on top so the bottom of the baking sheet is touching the parchment. Using oven mitts, hold the 2 baking sheets together and flip them over so the crust is now on the parchment on the upside-down baking sheet. Remove the first parchment from the crust, cut the crust into 1 1/2-inch-thick strips (you should have 8 to 9 strips) and spread them apart a little. Sprinkle with the remaining 1 cup Cheddar and 1/2 cup Parmesan. Bake on the upside-down baking sheet until the cheese is melted and turning brown in spots and the visible crust is a deep golden brown, 8 to 10 minutes.
• Let cool for 5 minutes, then transfer the sticks on the parchment to a serving plate and serve with the marinara sauce for dipping.
I personally enjoyed this recipe, having taken the original and modified it to suit my needs. The original included riced sweet potatoes which I omitted because I like to keep my carb relatively count low with the exception of one day a week where I’ll treat myself to a half of a small plastic cup of Breyers carb smart ice cream with whipped cream-I know I’m such a rebel! Anyway I hope you all enjoy this yummy, easy recipe and tag me on social media if you try it and love it! Using the hashtag #FridaysWithBrittany!
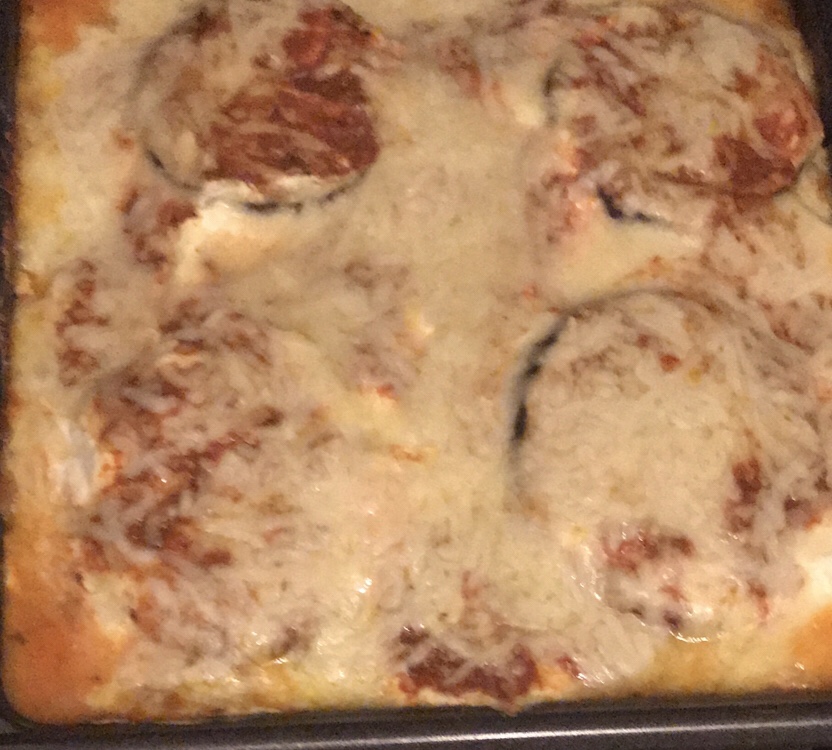
As I’m sure it is very evident in the last couple of posts, I am committed to the Akins way of life but I am also still a foodie at heart. That is why last Saturday when I was looking for a way to reward myself for losing over 29 pounds since the end of November I decided to create a dish that marries the flavors of my eggplant lasagna and add some spaghetti squash in for added veggie serving. I’m not 100% sure of the exact carb count but I know it is made with all Akins friendly things and definitely a low carb solution to the traditional lasagna.
I am very conscious of what I put in my body now so much that I can honestly say who I was a year ago is not the same person I am today and will be going forward. For me Atkins is a lifestyle, I have a lot of gluten sensitivities as well as sinus sensitivities which manifest themselves more pronouncedly when I eat high carbohydrates. This recipe is very time-consuming it takes about an hour and 15 minutes at least from start to finish but the prep is relatively easy and it’s so worth it when you take your first delicious bite.
So without further ado, I’ll get right to what you came here for, the recipe of course! Now my husband and I do not have kids but I’m going to say this is a fun way to get your kids to eat vegetables, spaghetti squash is very delicious and doesn’t really taste like anything so with the right amount of marinara sauce you can trick your kids into eating something that’s relatively healthy without them realizing it which is always a plus! Spaghetti squash is also very versatile and can be eaten hot or cold and in a wide variety of ways. Before you get started it’s important to understand that spaghetti squash is liable to get soggy if it’s overly drenched in sauce so a little bit definitely goes a long way!
Here’s what you’ll need:
1 spaghetti squash
1 small eggplant
Marinara sauce (I used my Father in Law’s super secret recipe)
1 12 oz container of Ricotta cheese (I used Shop Rite Brand)
Salt
Olive Oil
Pepper
Onion Powder
Garlic Powder
Pre Shredded Mozzarella Cheese
Got it all? Great let’s get started!
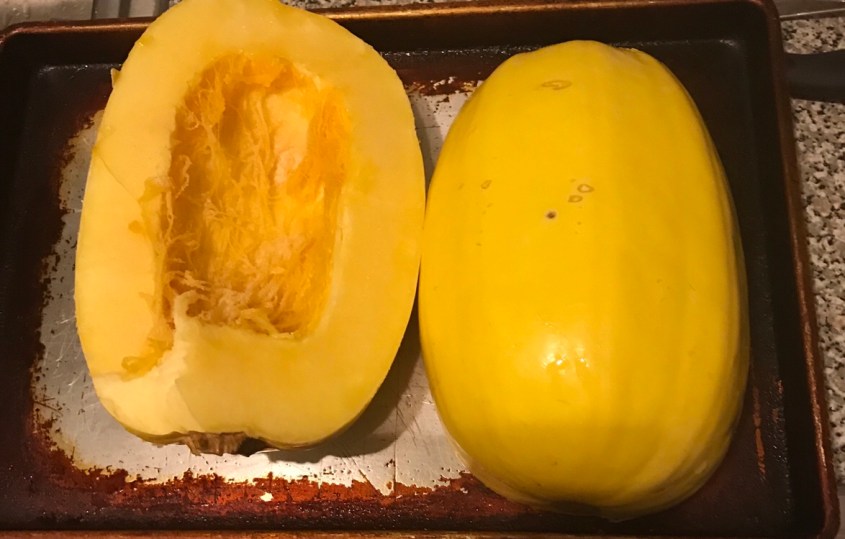
Cut your spaghetti squash lengthwise in half. This can be a pain in the butt so I had Tom help me with that!
Scoop out the squash seeds and other unnecessary insides, you’re not going to need them.
Season your squash with garlic powder, onion powder and a pinch of salt and pepper.
Preheat your oven to 375, throw your squash (open halves facing down) on a non stick surface of a baking sheet and bake for 45 minutes.
While your squash is cooking, slice up one small eggplant crosswise (about 3/4 inch slices).
Sprinkle olive oil, salt and garlic powder on both sides of your eggplant slices and let sit till your squash is ready.
Once your squash is ready, take it out of the oven and let cool. Next, you are going focus your eggplant by placing it onto a nonstick baking sheet and cooking them for 10 minutes.
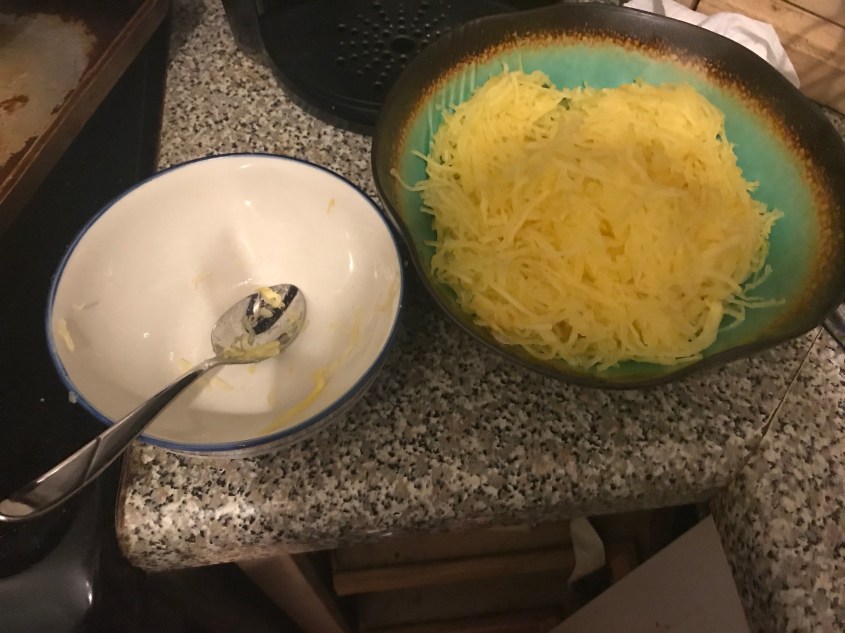
While your eggplant is cooking flip over the spaghetti squash halves and check to see if it is fork tender. Fork tender means that you are able to scrape the inside of it out and get a spaghetti type consistency of squash.
Scrape both halves of your spaghetti squash into a large bowl. You do not have to use all of it in your dish you can store whatever you would want to eat on another night in a separate container or if you wanted to make a large amount of the dish you can use it all, I opted to use both halves in my dish.
Once your eggplant is ready, now the fun part begins! Place a thin layer of marinara sauce, a thin layer of ricotta cheese, and sprinkle a generous helping of mozzarella cheese on the top of your eggplant and put back in the oven to bake for another 10 minutes or until cheese is melted.
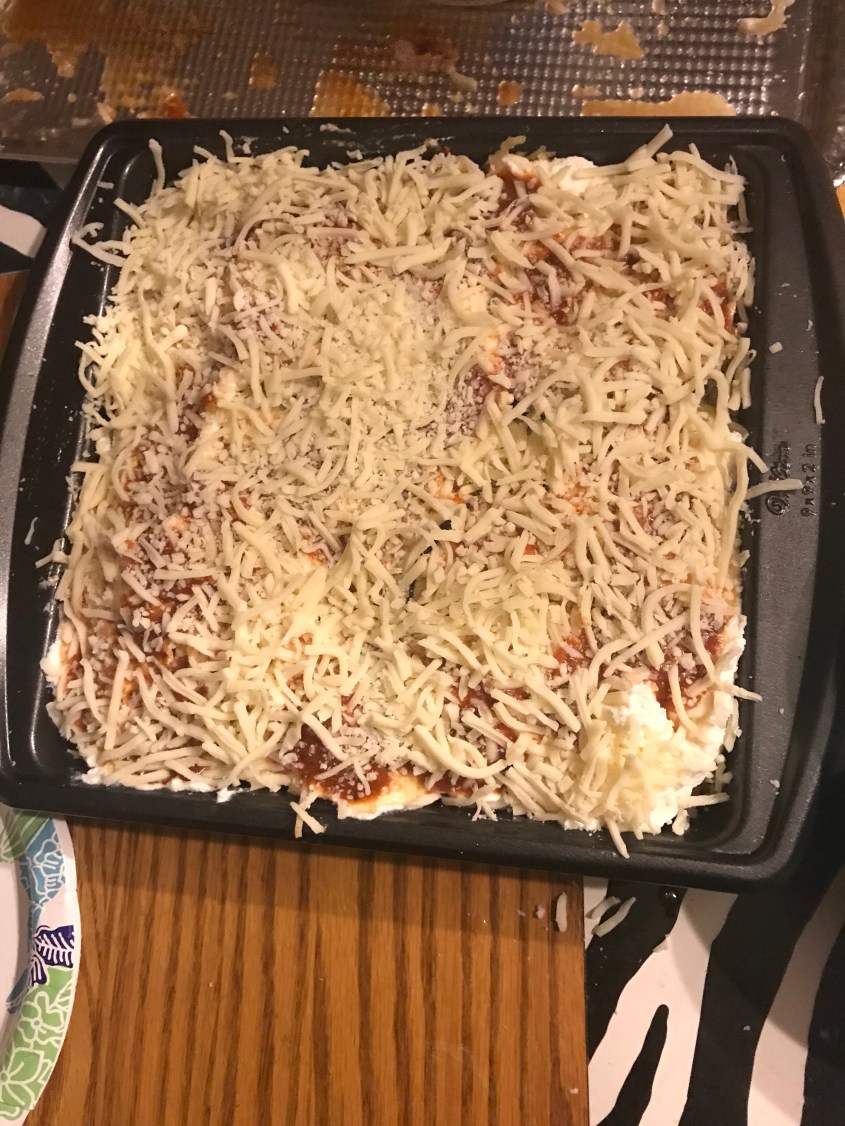
Once your eggplant is ready you’re ready to start the lasagna part! In a casserole dish place a thin layer of marinara sauce followed by a helping of spaghetti squash, a thin layer of ricotta cheese, eggplant slices, and mozzarella cheese. Follow this pattern until you have used all of the squash and eggplant. Sauce, Squash, Ricotta, Eggplant, and cheese. Sprinkle what is left of your mozzarella cheese on top of the dish.
Cover your casserole dish and place in the oven to cook for 15 minutes.
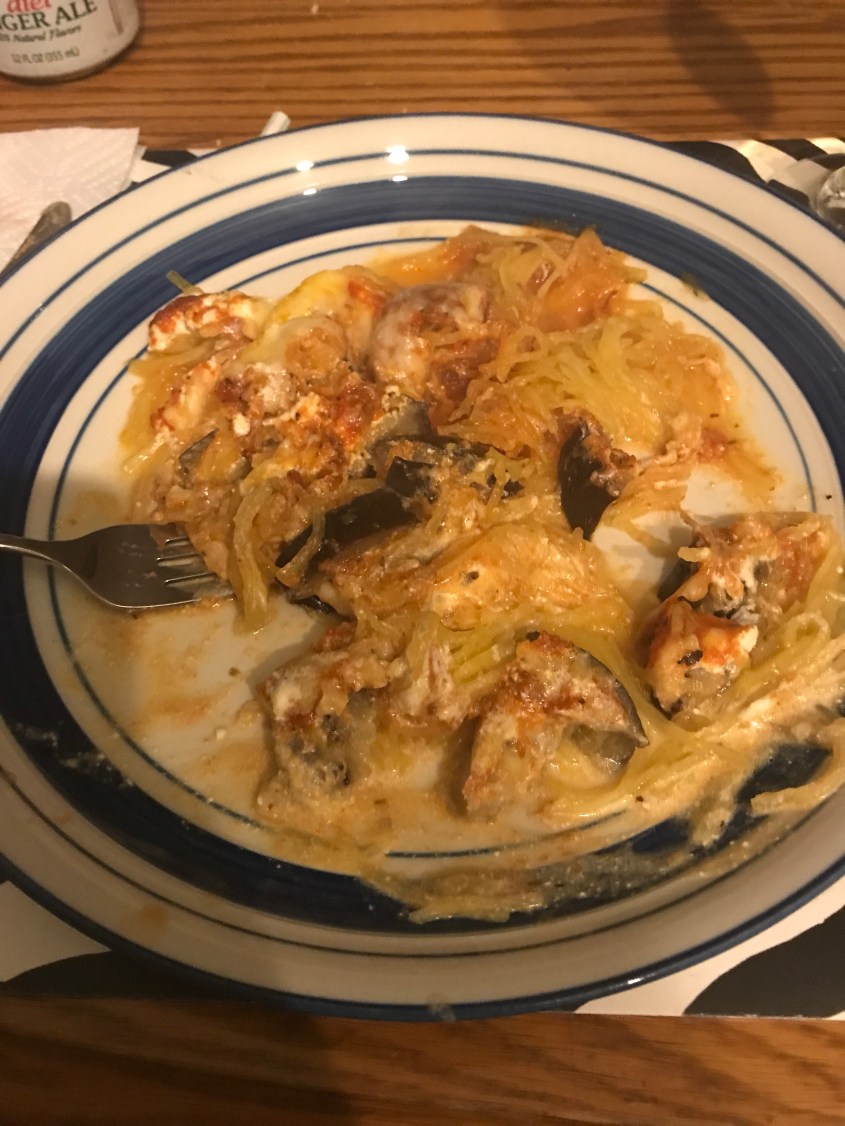
Uncover and bake again for 10 more minutes.
Let your dish sit for 2 minutes to cool and before you know it you’ll be on your way to having a nice romantic dinner for two…or more! Pour yourself some champagne or wine, light some candles and enjoy your meal while watching Talladega Nights.
Would you be interested in trying this recipe? Do you have any recipes that you found online that you would like me to try? Drop me a line in the comments and let me know!
So this week I tried Tasha Metcalf’s Fat Head Pizza Rolls and here’s what I thought…
As many of you may remember from my first blog with the egg plant lasagna, I also do an eggplant pizzas type dish in which I substitute English muffins with eggplant to create mini pizzas. If I’m truly honest with you I would say the hardest part of any low-carb diet is not eating pizza, what sane human being does not love pizza? But of course sometimes even eggplant doesn’t cut it which is why I was looking for the best kind of substitute to cure my pizza cravings. My brother-in-law makes his famous pizza rolls and the thought of never having something as delicious as that again was kind of disheartening, but like in any instance where I’m faced with a decision I try to make the best one for my body. I scoured the Internet and tried many recipes but so far only one lived up to my expectations Tasha Metcalf’s Fat Head Pizza rolls.
The best part was even my husband who is extremely picky when it comes to foods enjoyed this recipe and I’d like to share it with you!
What you’ll need for the dough:
1.5 cups of Shop Rite pre shredded mozzarella cheese
2 tablespoons of cream cheese (I used Philadelphia Cream Cheese)
3/4 Cup of Almond Flour
1 Large Egg
1/2 teaspoon of garlic power
I also added like a pinch of Italian seasoning to mine even though the recipe doesn’t call for it. Literally a pinch.
What You’ll Need For The Filling:
2 tablespoons of Hunt’s Pizza sauce (Hunt’s is the lowest carb pizza sauce I found)
Shredded Mozzarella cheese put as much as you’d like I’m obsessed with cheese so I used quite a bit!
Pepperoni, minced
Bacon, minced
**the recipe called for black olives and salami which my husband isn’t too fond of so I omitted them and replaced them with bacon**
I got the stuff, now what???
1 For the dough, melt the 2 cups shredded mozzarella with the cream cheese on the stove top until combined well or in the microwave for 2 minutes.
2 Stir in the remaining dough ingredients. Wet your hands and mix together as best you can to form a dough.
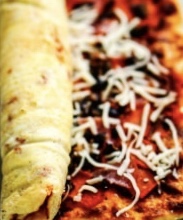
3 Roll between two pieces of parchment paper to the size of 8 by 16 inches.
4 Preheat the oven to 400 degrees F.
5 Spread 1/2 cup sauce over the dough. Lay the sliced mozzarella over the sauce. Spread out the slices of pepperoni and bacon.
6 Roll up and cut roll in half. Then slice 12 pieces.
7 Lightly spray an 8 inch pie dish with olive oil cooking spray and place the rolls in the pan. Top with remaining sauce.
8 Bake for 25-30 minutes or until browned on the edges.
9 Allow to cool for about 10 minutes or you won’t be able to pick them up as they will be too cheesy.
My rating of this recipe: 5/5 stars
While the crust was a little tricky and time consuming the taste is well worth the time and effort you put into making this dish, I give Tasha a lot of props for coming up with a classic that even pleased by picky husband.
What is your favorite low-carb pizza recipe? Leave a comment below and tell me what you think!
I tried Carolyn from ‘All Day I Dream of Food’s Recipe for Low Carb and Gluten Free Pigs in a blanket and he’s what I thought…
My husband and I work opposite shifts I work days and he works nights so quite often dinner is a quiet affair we have during his 45 minute break. I need our meals to be meaningful and also supportive of my healthy lifestyle change. I am a huge foodie and especially in the summertime nothing hits the spot like a hotdog on a warm bun,however, since I started Atkins again I’ve got to be mindful of carb count as well as the gluten allergy I realized I have.
So far I have lost 29 pounds in changing the way that I eat so I’m very picky when it comes to finding recipes which I don’t mind putting into my body. That’s when I came across the blog ‘all day long I dream of food’ and I found a lot of nifty recipes I would like to try particularly this one which I did try. In fact, they were so delicious I wasn’t even able to post my own picture we scoffed them down before I thought of it so I hope she doesn’t mind that I used the picture from the site I got the recipe off of. Once again this recipe is not mine but when I get excited about a recipe that I really enjoy I like to share it with all of you! So without further ado here is the low carb/ gluten free pigs in a blanket curtesy of Carolyn.
What you’ll need:
I used a large 12 pack of Nathan’s Hot Dogs.
3 oz of cheddar cheese sliced thinly into matchstick like shapes.
2 cups of almond flour (this will help you make the blanket part of the pigs in a blanket)
3 tablespoon of whey protein powder (unflavored)
2 tablespoons of coconut flour
2teaspoons of baking powder
1/2 teaspoon of garlic powder
1/2 teaspoon of salt
1/2 teaspoon xanthan gum
2 large eggs, lightly beaten
1/4 cup plus one tablespoon of melted butter
Got it…so what do I do next?!
I followed this recipe the very way it was laid out in Carolyn’s blog and it turned out amazing so here’s what you do:
1 With a sharp knife, make a slit in each hot dog from end to end, without cutting all the way through.
2 Fill slit with matchsticks of cheddar cheese.
3 Preheat oven to 350F and lightly and line a baking sheet with tin foil and spray a non- sticking spray also.
4 In a large bowl, whisk together the baking powder, almond flour, whey protein, coconut flour, garlic powder, salt and xanthan gum.
5 Stir in those eggs and 1/4 cup butter until dough comes together. Be prepared for massive stickiness!
6 Turn out dough onto a large piece parchment, and then pat into a rough rectangle.
7 Top with another piece of parchment and roll out to 1/4 inch thickness (about 12 inches by 12 inches). Peel off top piece of parchment paper.
8 Cut into 12 squares, if using regular hot dogs, or 26 small squares if using mini dogs (if your squares aren’t perfectly even or have some ragged edges, that’s okay…and you can gather up extra dough and re-roll as well).
9 Place each hot dog in the middle of a square and roll dough tightly around it. Transfer to prepared baking sheet.
10 Brush dough with remaining tbsp butter. Bake 20 minutes, until dough is light golden brown and cheese is melted.
11 To reheat, just place in a 250F oven for 8 to 10 minutes.
Tom and I really enjoyed this recipe it was really easy to make and very enjoyable for us to eat. This is the kind of meal you pair with a nice glass of champagne or even sparkling seltzer. For a couple who works opposite shifts and really values their dinner time it’s a great meal to just sit and enjoy while enjoying each other.
I Rate This Recipe: 4/5 stars because the crust part is messy and a little time consuming.
What are some of your favorite low-carb recipes? Drop a comment below and let me know what you think.
The good thing about a low-carb lifestyle is feeling and looking your best, but the downside is definitely missing some of my favorite classics like lasagna. Could I find a way to marry lasagna and low-carb life? Challenge accepted! See, Atkins allows me to take some of my favorite recipes and reinvent them to suit my low carb lifestyle. In this particular recipe I substitute lasagna noodles for eggplant, and I got to say it was a delicious way to indulge and stay within my range of 22 grams of carbs allowed per day.
Here’s what you’ll need from your local grocery store:
1 medium size eggplant
Salt
2 eggs
1/2 cup of Parmesan Cheese
1 jar of low carb tomato sauce (I use Hunt’s at 4 grams of carbs)
1 container of ricotta cheese (24 oz)
1 Bag of Pre-Shredded Mozzarella Cheese
Okay, so once you have all your ingredients slice and salt your eggplant until all moisture is completely extracted from it by patting it with a paper towel.
Next, place your eggplant slices on a baking sheet (make sure to drizzle a bit of oil or not sticking spray on the pan) and bake at 400 degrees until they start to brown generally about 25 minutes. Once your eggplant is baked and brown pull it out and let sit for two minutes before beginning the next process.
In a bowl, whisk the two eggs with about a cup or so of ricotta cheese and Parmesan cheese. Keep mixing till mixture is thick.
In a baking/casserole pan layer the tomato sauce, eggplant slices, tomato sauce, ricotta mixture, and mozzarella cheese and repeat in this pattern until you’ve used all your eggplant and layered it to resemble a lasagna.
Bake and 400 degrees for about 30-40 minutes or until mozzarella looks melted and slightly browned. Take out of the oven, let stand for 10 minutes and serve. Feeds about 8 people.
I really love this recipe because it’s not super hard to make but it’s also super filling a little bit goes a long way and you’re not left feeling hungry after eating it. It also gives you somewhat of a fix of having lasagna without the high carbs. Next time I will be trying this recipe with ground beef added into it and I will let you know how that turns out.
Bon appetite!
Love you. Mean it.
Brittany
Exactly like 1st Grade Where You're Told To Keep A Journal… Just Add Adulthood.